
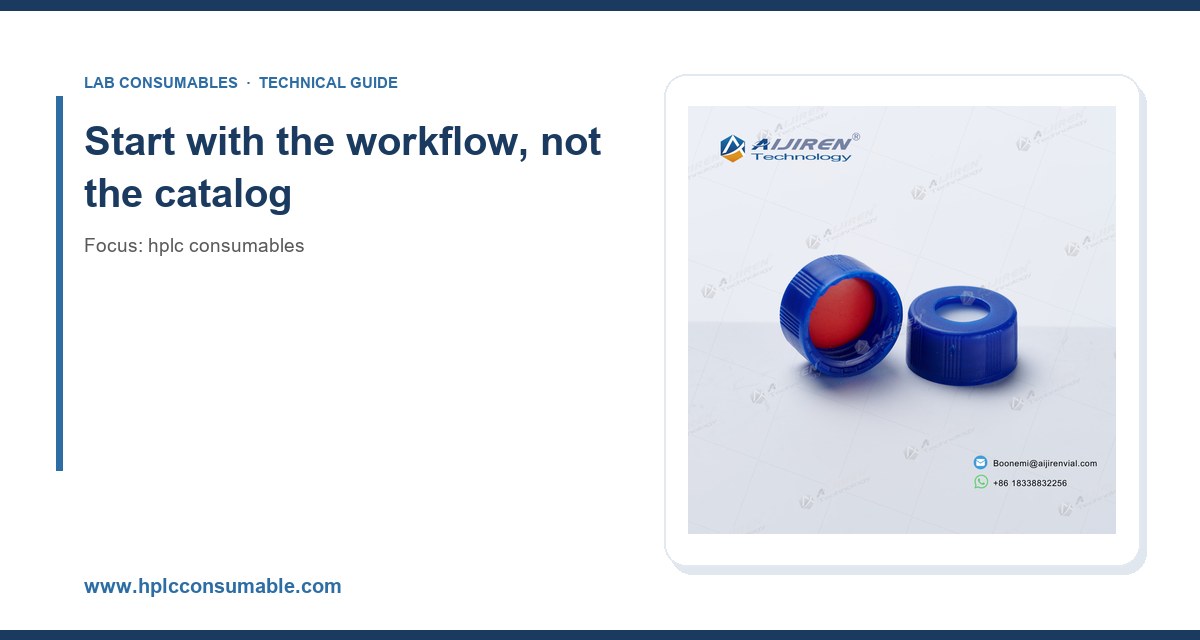
I still remember the Monday morning when a client’s QC lab called me in a panic. Their 96-well plate run had failed for the third time in a row, and the culprit turned out to be a $0.40 vial cap. The septa were the wrong durometer, the GC autosampler had punched through them 60 times over the weekend, and by Monday the injections were leaking. That’s the thing about HPLC consumables: the cheapest component in the system can take down a six-figure instrument. After 15 years of sourcing, testing, and occasionally cursing at these parts, here’s how I actually evaluate them.
Most buying mistakes happen before anyone opens a catalog. A procurement manager sees a part number on a requisition and orders 500 units. Six months later half of them are sitting in a cabinet because the method changed or the autosampler was swapped out. I’ve watched this happen with column hardware, frits, and even basic tubing. The fix is to map your workflow first, then match consumables to it.
Ask three questions before you buy anything:
- What is the actual sample matrix? Aqueous buffers, high-organic mobile phases, biological matrices, and trace metals all place different demands on the wetted path. A PEEK-lined column inlet that works fine for reversed-phase work can be a liability for ion chromatography.
- What is the duty cycle? A method development lab running 20 injections a day has very different consumable wear than a QC lab running 800. Septa puncture counts, frit loading, and column backpressure trends all scale with duty cycle, not with calendar time.
- What is the failure cost? A failed injection in a research lab costs a re-run. A failed injection in a regulated release test costs an OOS investigation, a deviation report, and possibly a batch rejection. That asymmetry should drive how much you’re willing to pay for consumable consistency.
Once you have those answers, the buying decisions get much clearer. You stop buying “the cheapest thing that fits” and start buying against a specification.
Columns: the consumable that drives everything else
Particle size, dimensions, and backpressure
Column selection is where most of the money goes and where most of the performance variation comes from. The core parameters are particle size, internal diameter, length, and pore size. Each one has a direct operational consequence.
For conventional HPLC at 400 bar (5,800 psi) or lower, 5 µm particles in a 4.6 mm × 150 mm column remain the workhorse. They are forgiving of extra-column volume, tolerate older pumps, and give you around 8,000 to 12,000 plates on a well-behaved method. Move to 3 µm and you can double the plate count at the same length, but backpressure roughly doubles too, which can push an older 400 bar system into pressure faults.
For UHPLC systems rated to 1,000 bar (15,000 psi) or more, 1.7 to 2.0 µm particles in 2.1 mm × 50 mm or 2.1 mm × 100 mm columns are the standard. Be realistic about extra-column volume: a 2.1 mm column with a 0.005″ ID transfer line and a standard 4 µL flow cell will lose a meaningful fraction of its efficiency to band broadening. If you’re moving from 4.6 mm to 2.1 mm, plan to change the flow cell and reduce tubing ID at the same time.
Pore size and stationary phase
Pore size matters more than most buyers realize. 100 Å pores are right for small molecules under about 3,000 Da. For peptides and small proteins, 300 Å is the practical choice. Using a 100 Å column for a 15 kDa protein gives you partial exclusion and peak shape that looks like a bad method when it’s actually a bad column choice.
Stationary phase selection is method-specific, but a few general rules hold. C18 remains the default for reversed-phase. C8 and phenyl phases are useful for very hydrophobic analytes and for selectivity changes when C18 doesn’t resolve a critical pair. HILIC phases handle polar analytes that won’t retain on C18. Mixed-mode phases (for example, strong cation exchange with reversed-phase character) are worth the extra method development time when you need to retain a charged analyte alongside neutral impurities.
Buy columns from suppliers who publish batch-to-batch reproducibility data. I’ve seen retention time drift of 3 to 5% between lots on poorly controlled columns, which is enough to break a system suitability criterion. Reputable suppliers publish lot-to-lot RSD values, and Agilent’s column documentation and Restek’s technical resources are good starting points for comparing specification sheets.
Vials and closures: the most underrated purchase
I’ll say it plainly: the vial and cap decision gets less attention than any other consumable, and it causes more autosampler failures than any other consumable. A vial is a piece of precision glass, and a cap is a precision seal. Treat them that way.
Glass grade and dimensions
Standard 2 mL autosampler vials follow a 12 × 32 mm footprint. That’s the de facto industry dimension, and most autosamplers are designed around it. 1.5 mL vials in the same footprint are also common, and 0.3 mL and 0.1 mL inserts exist for low-volume work.
Glass grade matters. Type I borosilicate is the correct choice for HPLC because it has low extractables and good chemical resistance. Type III soda-lime glass is cheaper but can leach alkali ions into aqueous samples, which is a real problem for ion chromatography and for pH-sensitive analytes. For trace metal work, silanized glass or plastic vials are worth the premium.
For high-throughput work, 96-well plates in the standard ANSI/SLAS footprint are the standard. Plate well volumes of 1 mL or 2 mL are common, and plate selection needs to match the autosampler’s plate nest. If you’re sourcing vials across a large program, OEM sample vials are worth evaluating for volume pricing and consistent glass lot quality.
Septa: durometer, thickness, and puncture count
Septa are where the real engineering happens. Standard silicone/PTFE septa in a 11 mm cap are the default for 2 mL vials. The PTFE faces the sample, the silicone provides the resealing force. For most HPLC work, a 1.0 mm thick septum is standard, with 0.8 to 1.0 mm being the normal working range.
Puncture count is the number that gets ignored. A standard silicone/PTFE septum in an 11 mm cap will reliably reseal for roughly 50 to 100 punctures before coring and leakage become a real risk. Pre-slit septa extend that to 200 or more punctures and reduce coring, but they also increase evaporation for volatile analytes. For long unattended runs, pre-slit septa are usually the better trade.
Septa durometer matters too. Softer silicone (around 40 Shore A) reseals well but cores more easily. Harder silicone (around 50 Shore A) resists coring but can leak if the cap torque is inconsistent. I’ve watched labs chase a mysterious injection volume RSD of 4% that turned out to be a batch of septa that were 3 Shore A softer than the previous lot.
Cap torque and closure selection
Crimp caps and screw caps each have a correct torque range. For 11 mm crimp caps, the crimping tool should be set so the cap is fully seated but the septum is not compressed beyond about 30% of its original thickness. Over-crimping causes coring; under-crimping causes leaks. For 9 mm screw caps, the practical torque range is roughly 1.0 to 1.5 in-lb (about 11 to 17 cN·m), applied consistently. Hand-tightened screw caps vary by 3x or more between operators, which is why automated capping tools are worth the investment for high-volume labs.
Closure selection also depends on the autosampler. Some autosamplers use a gripper that requires a specific cap height and diameter, and a cap that’s 0.5 mm too tall can jam the gripper. Check the autosampler’s specification sheet against the cap drawing before you commit to a lot. A good vial closures supplier will publish cap drawings with dimensions to two decimal places.
Filters, frits, and inline components
Inline filters and frits are small parts with outsized effects. A clogged frit shows up as rising backpressure, and a shedding frit shows up as a spike in baseline noise and a very confused analyst.
Frit pore size and material
For analytical HPLC, 0.5 µm frits are common in guard columns and inline filters, with 0.2 µm used for UHPLC and for very small-particle columns. Stainless steel frits are the default for standard work. PEEK frits are the right choice for ion chromatography and for methods that can’t tolerate metal contact. Titanium frits are worth the cost when you’re running very high pH or chloride-containing mobile phases that attack stainless steel.
Frit selection also affects column lifetime. A guard column with a 0.5 µm frit and a 2 mm bed of the same stationary phase as the analytical column will extend analytical column life by a factor of 3 to 5 in dirty matrices. The cost is a bit of extra backpressure and a small efficiency loss. In my experience that trade is almost always worth it.
Inline filters and solvent lines
Inline filters should be rated for the system’s pressure. A filter rated to 400 bar on a 1,000 bar system is a failure waiting to happen. Solvent inlet filters (frits) are typically 10 µm and should be checked monthly for discoloration and replaced quarterly in high-use systems. I’ve seen a single biofilm-covered solvent frit cause a week of ghost peaks before anyone thought to look at it.
Tubing, fittings, and the wetted path
Tubing and fittings are where small dimension errors cause big problems. The most common mistakes are using the wrong ID for the flow rate and using the wrong ferrule type for the fitting.
Tubing ID and flow rate
For analytical flow rates of 0.5 to 2.0 mL/min, 0.005″ to 0.007″ ID tubing is standard. For UHPLC at 0.2 to 0.5 mL/min, 0.003″ to 0.005″ ID is better. Oversized tubing adds extra-column volume and costs you efficiency. Undersized tubing adds backpressure. Use 0.010″ ID for preparative work above 5 mL/min.
Fittings and ferrules
Standard HPLC fittings are 1/16″ and use either stainless steel or PEEK ferrules. PEEK ferrules are reusable and finger-tightenable but can creep under high pressure. Stainless ferrules are more permanent but require a proper make-up tool and are not reusable. The most common failure I see is a stainless ferrule that was made up twice and now leaks at 200 bar. If you’re running above 600 bar, use stainless ferrules and check them with a pressure test at the start of every method.
GPI thread standards apply to some glass and plastic connections, and ISO 9001 and ISO 17025 apply to the supplier’s quality system, not to the part itself. Ask for the certificate of analysis and the lot number on every consumable order. If the supplier can’t produce lot traceability, that’s a signal.
A comparison checklist with concrete numbers
Here’s the decision table I use when a lab asks me to specify a consumable package. The numbers are the working ranges I trust; adjust them to your method, but don’t ignore them.
- Column: 4.6 × 150 mm, 5 µm, 100 Å for conventional HPLC; 2.1 × 100 mm, 1.7 µm, 100 Å for UHPLC. Backpressure target: below 400 bar for conventional, below 1,000 bar for UHPLC.
- Guard column: 0.5 µm frit, 2 mm bed, same phase as analytical column. Replace every 200 to 500 injections or when backpressure rises by 15%.
- Vials: 2 mL, 12 × 32 mm, Type I borosilicate, 11 mm cap. For 96-well plates, ANSI/SLAS footprint, 1 mL or 2 mL wells.
- Septa: 11 mm, silicone/PTFE, 1.0 mm thick, 50 Shore A. Puncture limit 50 to 100; switch to pre-slit for runs above 200 injections.
- Caps: 11 mm crimp or 9 mm screw. Torque 1.0 to 1.5 in-lb for screw caps. Verify cap height against autosampler spec.
- Tubing: 0.005″ to 0.007″ ID for analytical flow; 0.003″ to 0.005″ ID for UHPLC. 1/16″ fittings, stainless or PEEK ferrules matched to pressure.
- Inline filter: rated to at least 1.5x the system’s maximum pressure. 0.5 µm for conventional, 0.2 µm for UHPLC.
- Solvent frits: 10 µm, replaced every 3 months in high-use systems, monthly inspection.
That table isn’t a substitute for method-specific validation, but it’s a solid starting point that will keep most labs out of the common traps.
Operational precautions that actually matter
Buying the right part is half the job. The other half is using it correctly. These are the precautions I’ve seen prevent the most failures.
Storage and shelf life
Columns have a shelf life. Most manufacturers recommend use within 2 years of manufacture, and some phases degrade faster. Store columns in the solvent the manufacturer specifies, capped, at room temperature, and away from direct light. Vials and caps should be stored in sealed bags; once opened, use within 6 months to avoid dust and moisture contamination. Septa have a practical shelf life of about 12 months; older septa harden and core more easily.
Installation and conditioning
New columns need conditioning. Run 10 to 20 column volumes of the mobile phase at the method flow rate before injecting standards. For a 4.6 × 150 mm column, that’s roughly 25 to 50 mL. Skip this step and your first injections will show retention time drift that looks like a method problem. It isn’t.
Pressure and temperature limits
Respect the column’s pressure rating. A column rated to 400 bar run at 450 bar will fail, and the failure mode is usually a bed collapse that shows up as peak splitting. Temperature ratings matter too: most silica-based columns are rated to 60 °C, some to 80 °C, and a few to 90 °C. Running above the rating accelerates stationary phase hydrolysis and shortens column life. If your method needs higher temperature, buy a column rated for it.
Troubleshooting checklist
When something goes wrong, work through this list in order. It catches the majority of consumable-related failures.
- Rising backpressure: check the inline filter and guard column frit first, then the analytical column frit. A 15% rise over baseline is the trigger for replacement.
- Peak splitting or fronting: check for a void at the column inlet, usually caused by running above pressure rating or by a poorly made ferrule connection.
- Retention time drift: check mobile phase preparation, column temperature, and column age. A drift of more than 2% over a run is a flag.
- Ghost peaks: check solvent frits, mobile phase water quality, and vial septa. A contaminated solvent frit is a common and often overlooked cause.
- Injection volume RSD above 1%: check septa condition, cap torque, and autosampler syringe. Septa coring is the most common cause.
- Baseline noise: check detector lamp hours, flow cell condition, and inline filter. A shedding frit shows up as spikes rather than steady noise.
- Leaks at fittings: check ferrule make-up, especially after any tubing change. Pressure test at the method’s maximum pressure before running samples.
For regulated work, the underlying methods and acceptance criteria usually trace to standards like U.S. EPA SW-846 for environmental matrices, or to USP and AOAC methods for pharmaceutical and food work. Those documents specify the performance criteria your consumables need to meet, and they’re worth reading before you finalize a specification.
Supplier selection and total cost of ownership
Price per unit is the wrong metric. Total cost of ownership is the right one. A vial that costs $0.35 and causes one failed run per 1,000 injections is more expensive than a vial that costs $0.55 and causes none. The failed run costs you instrument time, analyst time, and possibly a deviation investigation.
When evaluating a supplier, ask for:
- Lot traceability on glass, septa, and column stationary phase. If they can’t give you a lot number, walk away.
- Certificate of analysis with the actual test values, not just a pass/fail statement.
- Change control notification. A supplier that changes glass sources or septum compound without telling you is a liability.
- Lead time and minimum order quantity. A 12-week lead time on a $0.40 part is a supply chain risk.
- Technical support. A supplier who can answer a question about septa durometer or frit pore size is worth a premium.
For broad programs, it’s worth consolidating with a chromatography supplier who can cover columns, vials, closures, and tubing from one quality system. Fewer suppliers means fewer quality audits and fewer lot-to-lot surprises. The HPLC consumables range at hplcconsumable.com is a reasonable starting point for a consolidated specification, and Thermo Fisher’s chromatography and sample handling documentation is useful for cross-checking specifications against a major supplier’s published data.
Takeaway
Choosing HPLC consumables is a specification exercise, not a shopping exercise. Map your workflow, match the consumable to the duty cycle and the failure cost, and buy against a written specification with lot traceability. The parts that matter most are the ones that get the least attention: septa durometer, cap torque, frit pore size, and tubing ID. Get those right and the expensive parts (columns, detectors, autosamplers) will last longer and fail less often. Get them wrong and you’ll spend your Monday mornings explaining why the QC run failed again.
References & further reading
Related resources from our lab consumables network:
- Hplc Consumables at hplcconsumable.com
- Chromatography Supplier at chromatographysupplier.com
- Oem Vial at oemsamplevials.com
- Vial Closures at vialclosures.com
External references and standards: